Are you a budding welder looking for tips on effectively controlling heat while welding?
It’s a common challenge for beginners, but fear not!
This article will guide you through managing heat during welding, offering you valuable insights and techniques to ensure the perfect weld every time.
We’ve covered everything from adjusting your machine settings to controlling travel speed.
So, let’s get started and ensure you have all the tools you need to master the art of welding!
1. Choosing the Right Welding Technique
One of the first steps is to choose the proper welding technique when controlling heat while welding.
Several different welding techniques are available, each with its advantages and considerations. Let’s take a look at some of the most common ones:
1.1 Gas Metal Arc Welding (GMAW)
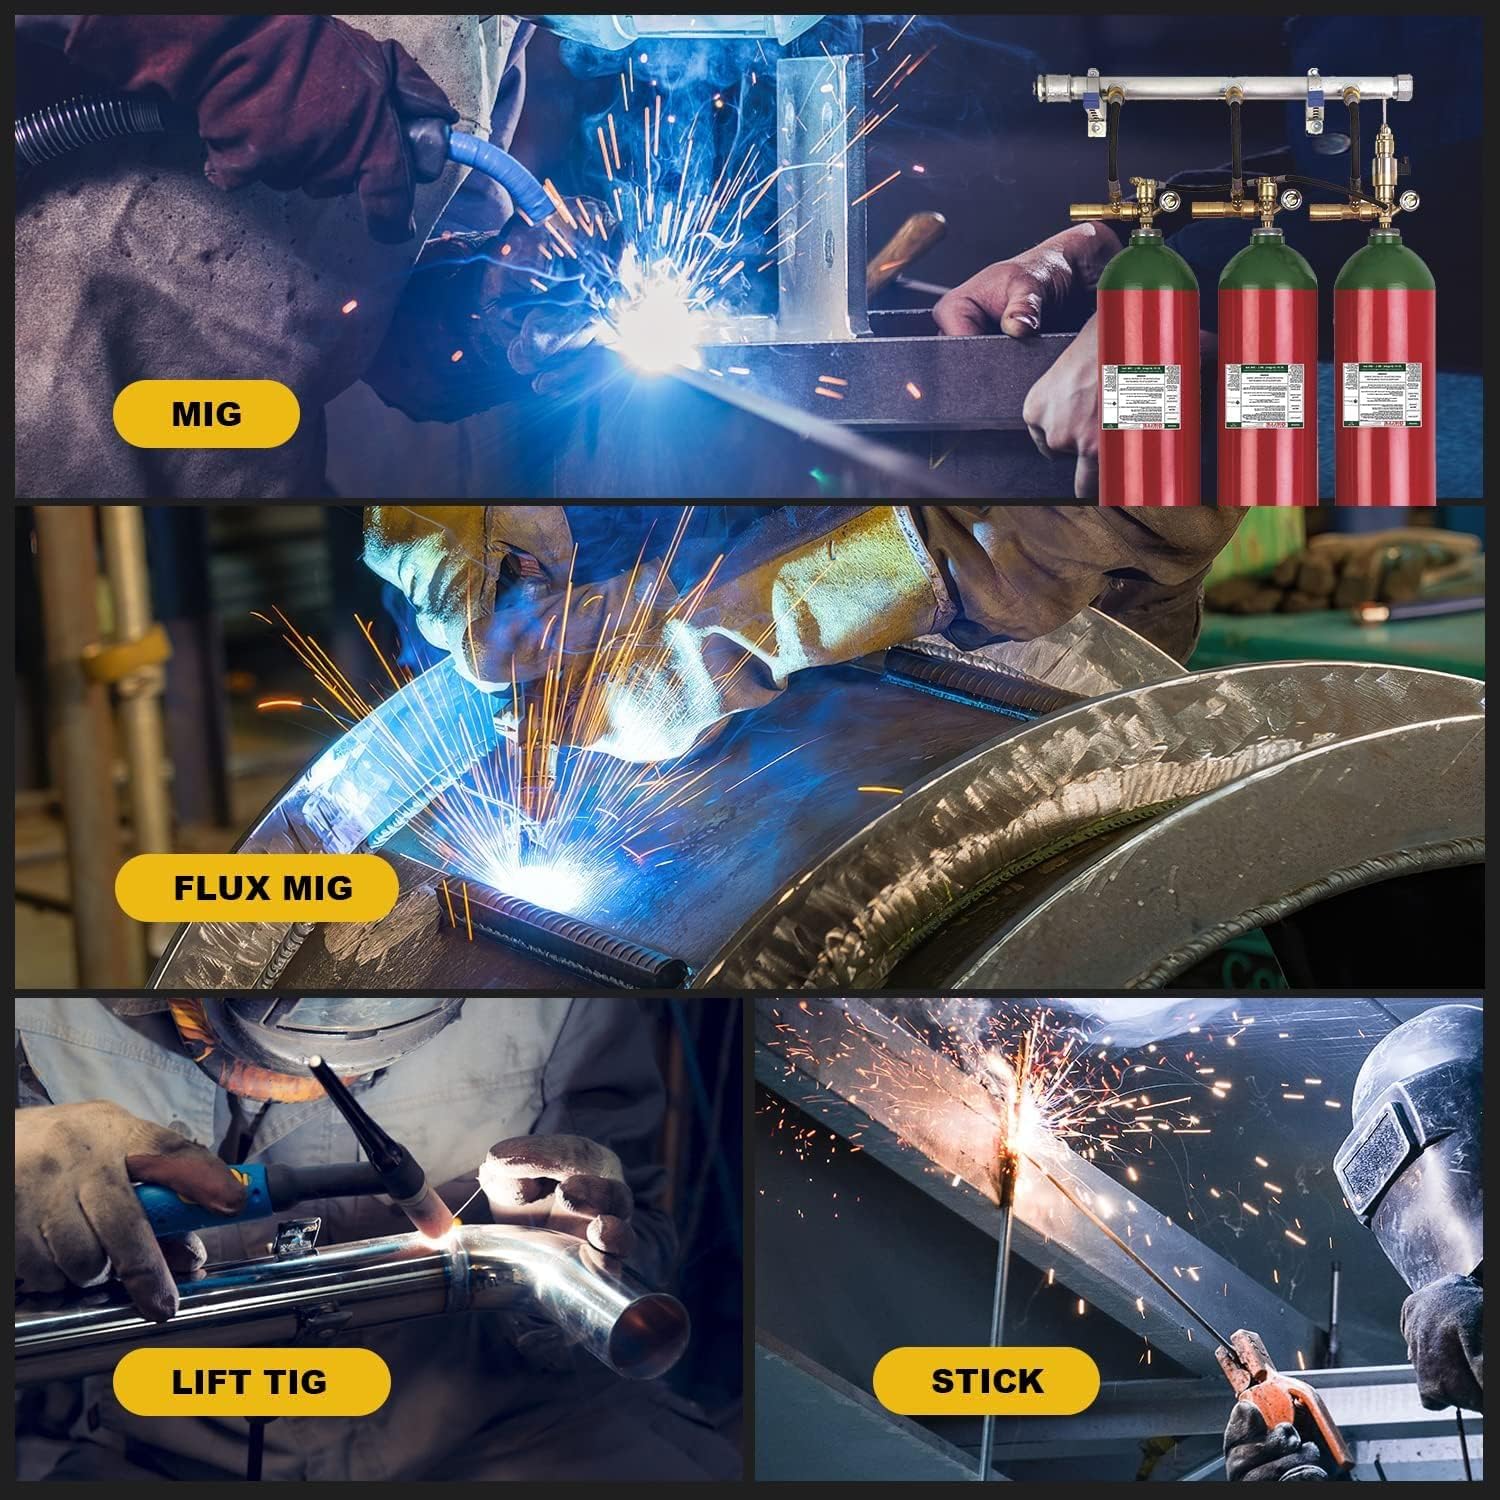
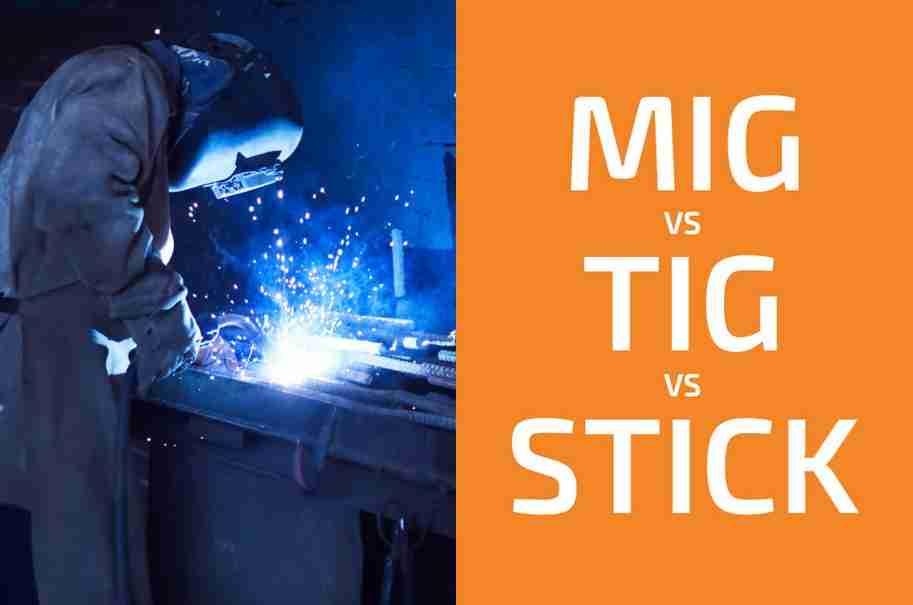
Gas Metal Arc Welding, also known as MIG welding, is a popular choice for many welding applications. It uses a consumable wire electrode and a shielding gas, typically a mixture of argon and carbon dioxide, to protect the weld pool from atmospheric contamination.
GMAW allows for high welding speeds and produces clean, precise welds. It is suitable for a wide range of materials and thicknesses.
1.2 Shielded Metal Arc Welding (SMAW)
Shielded Metal Arc Welding, commonly known as stick welding, is a versatile welding technique that uses a consumable electrode coated in flux. The flux creates a shielding gas when it melts, protecting the weld pool.
SMAW can be used in various positions and is suitable for welding thick sections and outdoor applications. It is more forgiving regarding cleanliness and can be used with a wide range of metals.
1.3 Flux-Cored Arc Welding (FCAW)
Flux-cored arc Welding is similar to GMAW but uses a tubular wire filled with flux instead of a solid wire electrode. FCAW is known for its high deposition rates, making it ideal for large-scale projects. It also provides better penetration on thick materials and allows for welding in windy conditions. However, it can produce more smoke and fumes compared to other techniques.
1.4 Gas Tungsten Arc Welding (GTAW)
Gas Tungsten Arc Welding, or TIG welding, is widely used for its precision and control. It uses a non-consumable tungsten electrode and a shielding gas, usually argon, to protect the weld area.
GTAW produces high-quality, clean welds and allows for the welding of various materials, including exotic metals. It is commonly used in industries such as aerospace and automotive.
1.5 Submerged Arc Welding (SAW)
Submerged Arc Welding is a technique that involves feeding a consumable electrode, flux, and a layer of granular flux onto the welding area.
The flux layer shields the arc, preventing atmospheric contamination. SAW is commonly used in heavy-duty applications, such as welding thick plates or significant structural components. It offers high deposition rates and deep penetration.
Choosing the proper welding technique depends on several factors, including the type of material, the thickness of the workpiece, the desired weld quality, and the specific application. It’s essential to consider these factors and consult an experienced welder or welding engineer to determine the most suitable technique for your project.
2. Preparing the Workpiece
In addition to choosing the correct welding technique, proper workpiece preparation is crucial for controlling heat during welding. Neglecting proper preparation can lead to poor weld quality, distortion, and even weld failure. Let’s explore some essential steps in preparing the workpiece:
2.1 Cleaning the Surface
Before welding, it is essential to ensure that the surface of the workpiece is clean and free from any contaminants.
This includes removing any dirt, rust, paint, or oil that may be present. Cleaning can be achieved using various methods, such as wire brushing, grinding, or chemical cleaning. Clean surfaces enable better arc stability, reduce the risk of porosity in the weld, and promote optimal heat transfer.
2.2 Removing Moisture
Moisture can harm the welding process, leading to hydrogen-induced cracking or porosity in the weld.
Therefore, removing any moisture from the workpiece before welding is essential. This can be done by preheating the workpiece or using heat lamps. Additionally, storing the materials in a dry environment before welding can help prevent moisture absorption.
2.3 Preheating the Workpiece
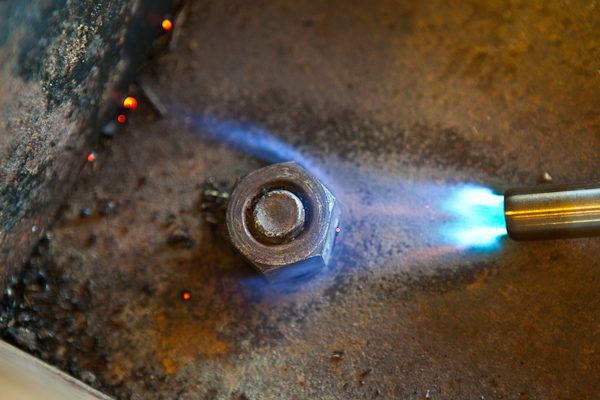
Preheating the workpiece can be beneficial in controlling heat during welding, especially for materials with high thermal conductivity or heat absorption.
Preheating helps to minimize the temperature difference between the weld and the surrounding base metal, reducing the risk of cracking and distortion. The preheating temperature and duration will vary depending on the welded material and thickness.
Properly preparing the workpiece through cleaning, moisture removal, and preheating ensures that the welding process starts on a clean and controlled surface, allowing for better heat management during the welding operation.
3. Controlling the Welding Parameters
Controlling the welding parameters, such as voltage, current, and welding speed, is crucial in managing heat during welding.
These parameters directly influence the amount of heat input into the workpiece. Let’s delve into each aspect of controlling the welding parameters:
3.1 Adjusting Voltage and Current
Voltage and current are the primary parameters controlling the heat generated during welding. Increasing the voltage or current will result in higher heat input while decreasing the heat.
They balance the voltage and current to achieve the desired weld penetration and ensure proper fusion. The optimal settings depend on material thickness, joint design, and welding technique.
3.2 Managing Welding Speed
Welding speed is another critical parameter in heat control. Faster welding speeds result in less heat input, while slower speeds increase heat input.
Adjusting the welding speed allows you to regulate the heat input and prevent overheating or underheating. Maintaining a steady and consistent welding speed throughout the process is essential, ensuring proper fusion and minimizing the risk of defects.
3.3 Manipulating Arc Length
The length of the welding arc also influences the heat input. A shorter arc length concentrates the heat, leading to higher temperatures and increased penetration.
On the other hand, a longer arc length spreads out the heat, reducing the temperature and penetration. Adjusting the arc length can help fine-tune the heat input, especially when welding materials of varying thicknesses or joint configurations.
By carefully adjusting the welding parameters, you can control the heat input and ensure the weld remains within the desired temperature range.
Monitoring and adjusting these parameters throughout welding will help maintain optimal heat control and produce high-quality, defect-free welds.
4. Using Heat Control Accessories
Appropriate heat control accessories can significantly enhance safety and heat management during welding. These accessories protect the welder and help maintain a controlled environment. Let’s explore some essential heat control accessories:
4.1 Heat-Resistant Gloves and Clothing
Protecting your hands and body from burns is crucial when working with high temperatures. Heat-resistant gloves and clothing made from leather or Kevlar provide a barrier against heat, sparks, and splatter.
Wearing heat-resistant gloves and clothing ensures you can handle hot materials and work near the welding arc without risking injury.
4.2 Heat-Proof Curtains and Shields
Heat-proof curtains and shields create a physical barrier between the welding operation and the surrounding area. They can strategically block radiant heat, sparks, and UV radiation.
By isolating the welding area, heat-proof curtains and shields protect nearby objects and personnel from exposure to excessive heat and potential hazards.
4.3 Heat-Reducing Mats and Pads
Heat-reducing mats and pads help to minimize heat transfer to the work surface or nearby objects. These mats are typically made from materials with high-temperature resistance and insulation properties. Placing a heat-reducing mat or pad beneath the workpiece during welding helps dissipate heat and prevents heat-related damage.
Using the right heat control accessories ensures the welder’s safety and helps maintain a controlled work environment. These accessories offer protection against heat hazards and minimize the risk of accidents or injuries caused by excessive heat exposure.
5. Ensuring Proper Ventilation
Proper ventilation is essential in controlling heat and managing fumes and gases generated during welding.
Adequate ventilation provides continuous fresh air, diluting and removing hazardous fumes and airborne particles. Let’s explore some methods of ensuring proper ventilation during welding:
5.1 Providing Sufficient Airflow
Good airflow in the welding area helps to disperse heat and fumes, creating a safer working environment. Having open windows or doors or working in outdoor areas with natural airflow can help facilitate ventilation.
Ensuring sufficient space around the welding operation allows for adequate airflow and reduces the accumulation of heat and fumes.
5.2 Using Local Exhaust Ventilation (LEV)
Local Exhaust Ventilation (LEV) systems are designed to capture and remove fumes and gases directly at the welding source. These systems consist of hoods or suction nozzles connected to a ventilation system that removes contaminants from the welder’s breathing zone. Using LEV systems prevents fumes from dispersing into the surrounding air, effectively controlling the heat and improving the air quality in the workspace.
5.3 Installing Mechanical Ventilation Systems
In addition to LEV systems, mechanical ventilation systems can be installed to provide overall air circulation and maintain a comfortable working environment.
These systems use fans or blowers to create a consistent airflow, removing heat, fumes, and airborne particles. Mechanical ventilation systems are particularly useful in enclosed or confined spaces with limited natural airflow.
Ensuring proper ventilation is crucial for heat control and maintaining a safe work environment. Adequate airflow helps dissipate heat and eliminates hazardous fumes, protecting the welder and those nearby from excessive heat exposure and potential health risks associated with welding fumes.
6. Utilizing Preheating and Post-Heating Techniques
Preheating and post-heating techniques can be employed to control heat during the welding process.
These techniques help manage heat input, reduce the risk of cracking, and improve the overall quality and integrity of the weld. Let’s explore the benefits and methods of preheating and post-heating:
6.1 Benefits of Preheating
Preheating the workpiece before welding offers several benefits. It helps to reduce the temperature differential between the weld and the base metal, minimizing the risk of cracking caused by rapid cooling.
Preheating also promotes better fusion and allows for thorough penetration of the weld. Additionally, it can help improve the mechanical properties of the welded joint, including hardness and toughness.
6.2 Methods of Preheating
There are various preheating methods, depending on the material and its thickness. Some standard techniques include using a gas torch, heating blankets, heat lamps, or induction heating.
The preheating temperature and duration will depend on material composition, thickness, and welding technique. Following recommended preheating procedures provided by welding codes or consulting with a qualified welding professional is essential.
6.3 Importance of Post-Heating
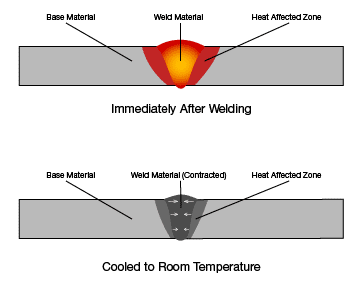
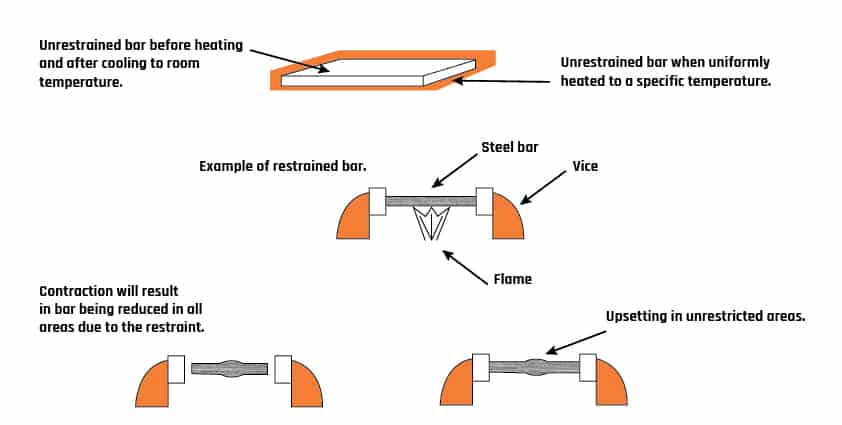
Post-heating, or applying heat to the completed weld, is often necessary for specific materials and welding processes. Post-heating helps to relieve residual stresses that may have developed during welding, reducing the risk of distortion and cracking. It also promotes the desired microstructure and improves the overall mechanical properties of the weld. Post-heating is particularly critical for high-strength steel and certain alloy materials.
By utilizing preheating and post-heating techniques, you can effectively manage heat input, control residual stresses, and enhance the quality and reliability of the weld. Considering the material properties, joint design, and welding requirements will help determine the need for preheating or post-heating in your welding process.
7. Monitoring and Controlling Heat Input
Monitoring and controlling the heat input during welding is essential to ensure the weld remains within the desired temperature range.
Heat input refers to the energy applied to the workpiece during welding. Let’s explore the importance of heat input measurement and some control methods:
7.1 Heat Input Measurement
Heat input can be measured by calculating the energy delivered to the workpiece per unit length of the weld. The formula generally involves voltage, current, travel speed, and efficiency factors.
Heat input measurement allows consistency and control, ensuring the welding process remains within the specified heat input range. Various tracking devices and heat input calculators are available to monitor and measure heat input.
7.2 Heat Input Control Methods
Depending on the welding process and technique, controlling heat input can be achieved through various methods. Some standard control methods include adjusting the voltage, current, and welding speed or using pulse welding techniques.
Pulse welding provides intermittent heat input, allowing for better control and reduced heat accumulation. Additionally, controlling the interpass temperature and the temperature between welding passes can help manage heat input during multi-pass welding.
Proper monitoring and control of heat input ensure that the weld remains within the desired temperature range, preventing issues such as overheating, underheating, or forming undesirable microstructures. Following established procedures, maintaining accurate records, and regularly inspecting the weld for quality assurance is essential.
8. Employing Welding Heat Sinks
Welding heat sinks are devices used to absorb and dissipate heat generated during welding quickly. They assist in controlling the heat input, minimizing distortion, and preventing heat-related defects. Let’s explore some commonly used welding heat sinks and their application:
8.1 Types of Welding Heat Sinks
- Copper Heat Sinks: Copper is an excellent conductor of heat, making it an ideal material for heat sinks. Copper heat sinks can absorb and distribute heat away from the weld, reducing the risk of distortion and ensuring uniform cooling. They are often used in applications where precise control of heat input is required, such as in electronics or delicate welding operations.
- Water-Cooled Heat Sinks: Water-cooled heat sinks utilize a water circulation system to absorb and dissipate heat. Water is circulated through channels or pipes incorporated within the heat sink, carrying the heat away to an external cooling system. Water-cooled heat sinks are particularly effective for high-heat applications and provide continuous cooling for extended periods.
8.2 Application and Benefits of Welding Heat Sinks
Welding heat sinks are typically attached to the workpiece or positioned near the welding area to absorb excess heat. They help to maintain a controlled temperature during welding, preventing overheating and distortion.
By dissipating heat quickly, welding heat sinks allow for faster cooling rates, reducing the risk of heat-related defects such as cracking or warping. Welding heat sinks can improve weld quality, increase productivity, and minimize the need for post-welding corrections.
The specific choice of welding heat sink will depend on the welded material, the heat input requirements, and the desired cooling rate. Consulting with a welding specialist or heat sink manufacturer can help determine the most suitable heat sink for your welding application.
9. Multiple Pass Welding Techniques
In some cases, welding may require multiple passes to achieve the desired weld quality and strength. Managing heat accumulation during multiple-pass welding is crucial to ensure proper fusion and minimize the risk of defects.
Let’s explore the importance of multiple passes and some techniques for managing heat accumulation:
9.1 Importance of Multiple Passes
Multiple pass welding allows for the deposition of more weld metal, ensuring sufficient penetration and reinforcement. It is often necessary when welding thick materials or creating strong weld joints.
Distributing the heat input over several passes can minimize the risk of overheating and potential defects associated with excessive heat input. Multiple passes also allow control of the cooling rate, promoting better metallurgical properties.
9.2 Managing Heat Accumulation with Multiple Passes
To effectively manage heat accumulation during multiple-pass welding, several practices can be implemented:
- Proper Interpass Temperature Control: Controlling the interpass temperature, the temperature between successive welding passes, is crucial in managing heat accumulation. Keeping the interpass temperature within the specified range helps control the overall heat input and prevents excessive heating.
- Appropriate Cooling Intervals: Allowing sufficient cooling time between each pass helps dissipate heat and avoid heat build-up. Cooling intervals also provide an opportunity for stress relief, reducing the risk of distortion or cracking.
- Control of Welding Parameters: Adjusting welding parameters such as voltage, current, and welding speed can help manage heat input during each welding pass. Balancing these parameters ensures consistent heat distribution and avoids localized overheating.
Proper sequencing, control, and monitoring of multiple pass welding operations are essential to maintain optimal heat control and achieve high-quality, defect-free welds. Following industry standards and consulting with weld design professionals for guidance in multi-pass welding procedures is recommended.
10. Conducting Proper Welding Posture and Technique
Proper welding posture and technique are vital for effective heat control and producing high-quality welds. Proper body alignment and steady hand movements significantly manage heat input and achieve consistent weld bead formation. Let’s explore critical aspects of welding posture and technique:
10.1 Maintaining Steady Hand Movements
Welding requires steady and controlled hand movements to ensure accurate heat application and weld placement.
Shaking or excessive movement can result in uneven heat distribution and weld defects. Proper hand and wrist positioning and a relaxed yet firm grip on the welding torch contribute to better control over the heat input.
10.2 Using Proper Body Alignment and Posture
Proper body alignment and posture are essential for maintaining stability and controlling the welding arc. Aligning the body perpendicular to the weld joint provides better visibility and control. It also helps maintain a consistent arc length and ensures the proper heat distribution. Keeping a stable and balanced stance reduces fatigue, allowing longer, more controlled welding sessions.
10.3 Efficient Torch Manipulation
Torch manipulation involves the movement of the welding torch about the weld joint. It dramatically impacts the heat input and weld quality.
Holding the torch at the correct angle and distance from the workpiece ensures consistent arc stability and heat distribution. Efficient torch manipulation techniques, such as weaving or oscillating motion, can help manage heat input and prevent overheating or underheating the weld.
Practicing good welding posture and technique is essential for maintaining control over the welding process and managing heat input effectively. Regular training and adherence to proper welding techniques will improve weld quality, enhance heat control, and increase productivity.
In conclusion, it is controlling heat while welding requires a combination of careful technique selection, proper workpiece preparation, monitoring and adjusting welding parameters, and appropriate heat control accessories.
By following these guidelines and utilizing sound heat management practices, you can ensure that your welding projects are efficient and produce high-quality welds.


