We all know that having a reliable and sturdy welding table is crucial for any welding project. But what if you’re on a tight budget and can’t afford to splurge on an expensive one? Well, fret not, because we have just the solution for you. In this article, we will share some practical tips and tricks on how to make a budget-friendly welding table without compromising on quality or functionality. So, whether you’re a professional welder or a DIY enthusiast, get ready to learn some innovative ways to create your very own welding table that won’t break the bank.
Selecting the Right Materials
When it comes to building a welding table, selecting the right materials is crucial for its long-term durability and performance. One of the most important factors to consider is choosing the right metal. We recommend using steel for its strength and versatility. Steel is a commonly used material in welding tables due to its high resistance to heat and corrosion.
In addition to the metal, the tabletop also requires careful consideration. It should be thick and sturdy enough to withstand the weight of the materials being welded. A thickness of at least 1/2 inch is recommended to ensure stability. Another aspect to consider is the surface finish. A smooth and flat surface is important for accurate welding and ease of movement during the welding process.
When selecting the legs and base for your welding table, prioritize stability and durability. The legs should be sturdy enough to support the weight of the table and withstand the vibrations caused by welding. Look for options with adjustable leveling feet to ensure stability on uneven surfaces.
Designing the Table
Before diving into the construction process, it’s important to have a clear vision for the design of your welding table. The first step is to determine the dimensions of the table. Consider the space available in your workshop and the size of the projects you typically work on. It’s essential to strike a balance between a table that is large enough to accommodate your needs and one that doesn’t take up excessive space.
Next, decide on the shape of the table. The most common shapes for welding tables are rectangular and square, as they provide ample working surface and allow for efficient organization of materials and tools. However, depending on your specific needs, you may opt for a different shape, such as L-shaped or U-shaped, to maximize workspace efficiency.
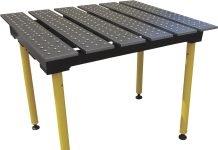
Additionally, consider any additional features you might want to incorporate into your welding table design. This could include built-in tool holders, storage compartments for welding accessories, or a slotted surface to accommodate clamps and fixtures. Adding these features can enhance the functionality and convenience of your welding table.
Constructing the Welding Table
Once you have finalized your design, it’s time to start constructing the welding table. The first step is to prepare the materials. This involves measuring and cutting the steel sheets for the tabletop and legs according to the dimensions determined during the design phase. Take care to ensure accurate measurements and clean cuts for precise assembly.
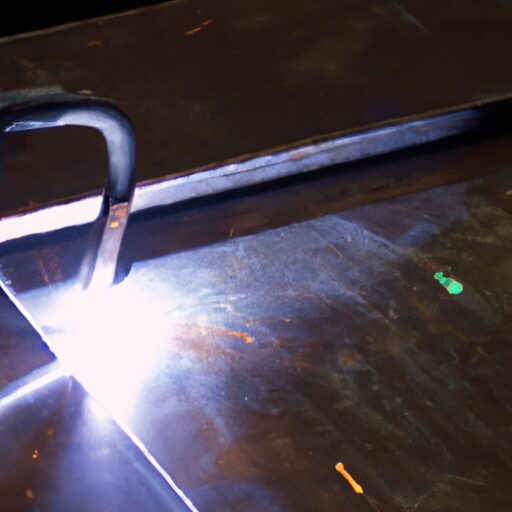
After preparing the materials, you will begin the process of cutting and welding the tabletop. Use a steel-cutting saw or a plasma cutter to cut the steel sheets to the desired size. Once the tabletop pieces are cut, you can begin welding them together using a welding machine. Be sure to follow proper welding techniques and use appropriate safety gear throughout the process.
Assembling the legs and base is the final step in constructing the welding table. Align the legs with the corners of the tabletop and weld them securely into place. Double-check for stability and make any necessary adjustments to ensure a level and secure base.
Adding Accessories
To enhance the functionality and versatility of your welding table, consider adding accessories that can assist you during the welding process. One valuable addition is a sliding clamp system. This allows you to secure workpieces in place, ensuring accuracy and stability while welding. The sliding mechanism enables easy repositioning of the clamps according to the size and shape of the workpiece.
Another important accessory is a grounding clamp. Proper grounding is essential for safety during welding. Install a grounding clamp onto your welding table, ensuring a secure connection to the welding machine. This will help prevent electrical shock and ensure efficient grounding throughout the welding process.
Incorporating tool holders into your welding table design can also greatly improve productivity. Attach tool holders to the sides or back of the table to keep commonly used welding tools within arm’s reach. This saves time and eliminates the need for constant searching and reaching for tools, allowing for a more efficient workflow.
Finishing and Painting
After the construction of the welding table is complete, it’s time to give it a finishing touch. Begin by preparing the surface for painting. This involves removing any grease, oil, or rust from the table. Use a wire brush or sandpaper to scrub the surface, ensuring a clean and smooth foundation for the paint.
When choosing the right paint for your welding table, opt for a high-temperature paint that can withstand the heat produced during welding. Look for paints specifically designed for metal surfaces and capable of withstanding temperatures up to at least 500°F. Apply multiple coats of paint, allowing each coat to dry thoroughly before applying the next.
Once the paint has dried, inspect the table for any imperfections or areas that may require touch-ups. Use fine-grit sandpaper to smooth out any rough spots or imperfections on the surface. Finally, add any finishing touches, such as applying a clear topcoat for added durability or adding a protective edge banding to prevent damage to the tabletop edges.
Ensuring Durability and Safety
To ensure the long-term durability and safety of your welding table, certain measures should be taken. One important aspect is reinforcing the tabletop. Depending on the thickness of your tabletop, consider adding additional support underneath to prevent warping or bending. This can be achieved by welding additional metal beams or braces underneath the tabletop surface.
Stabilizing the welding table is also crucial for safety and precision. Use adjustable leveling feet on each leg of the table to compensate for any uneven flooring. This will ensure that the table remains steady and level during welding, preventing any tipping or wobbling that could compromise the integrity of the welds being performed.
In addition to stability, adding heat and fire resistance to your welding table can further enhance safety. Consider adding a fire-resistant material, such as ceramic fiberboard or firebricks, under the tabletop surface. This provides an added layer of protection against heat and sparks, reducing the risk of fire or damage to the table.
Budget-friendly Alternatives
Building a budget-friendly welding table doesn’t mean compromising on quality or functionality. There are several alternatives to consider that can help you save money while still achieving a reliable and functional workspace.
One option is to use recycled materials. Look for scrap metal or discarded steel sheets that can be repurposed for constructing the tabletop and legs. This not only saves money but also reduces waste and promotes sustainability.
Another alternative is repurposing existing furniture. If you have an old workbench or table that is still structurally sound, consider modifying it to function as a welding table. Reinforce the top surface with steel sheets, add necessary accessories, and make any other modifications required for a proper welding setup.
DIY welding table kits are also worth exploring for budget-conscious welders. These kits typically include pre-cut pieces of metal, along with detailed instructions for assembly. While they may require additional effort and time compared to building from scratch, they offer a convenient and cost-effective solution for those who prefer a more structured approach to construction.
Maintenance and Care Tips
To keep your welding table in optimal condition, regular maintenance and care are essential. Regularly clean the table surface to remove welding grime and debris. Use a wire brush or a scraper to remove any stubborn residue. Avoid using abrasive cleaners or metal brushes that could damage the surface finish.
Periodically inspect the table for any signs of wear or damage. Check the welds for integrity and make any necessary repairs promptly. This will help prevent further damage and ensure the stability and safety of the table during welding.
When not in use, store and protect the welding table appropriately. If possible, keep it in a covered area to prevent exposure to rain or moisture. Consider using a protective cover to shield the table from dust and debris when not in use for extended periods.
Conclusion
Building a budget-friendly welding table requires careful consideration of materials, thoughtful design, and attention to detail during construction. By selecting the right materials, designing a functional table, and incorporating accessories that enhance productivity, you can create a welding table that meets both your budget and your welding needs. Regular maintenance and care will ensure its longevity and safety, allowing you to enjoy a reliable and durable workspace for all your welding projects.


