In the world of welding, precision is key. And that’s where welding gauges come into play. Designed to measure and verify the accuracy of welds, these handy tools ensure that every joint is executed with utmost precision. From checking the correct angle to assessing the proper depth and height, a welding gauge serves as an invaluable companion for welders, enabling them to produce high-quality and durable welds. So, what exactly is the role of a welding gauge? Let’s find out.
Understanding Welding Gauges
Definition of Welding Gauges
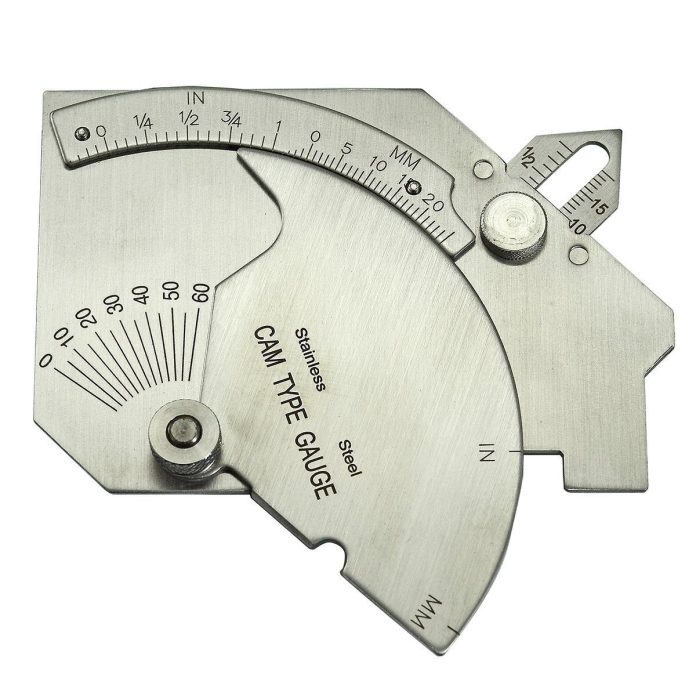
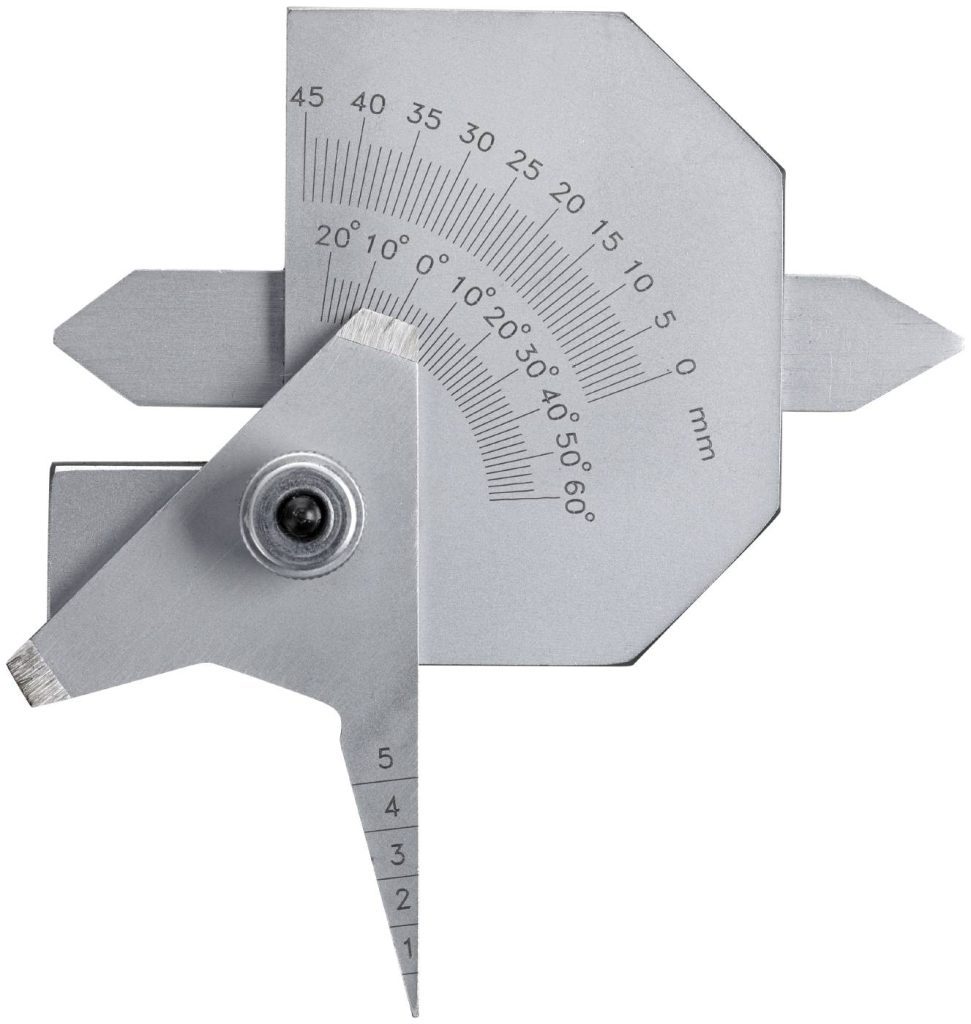
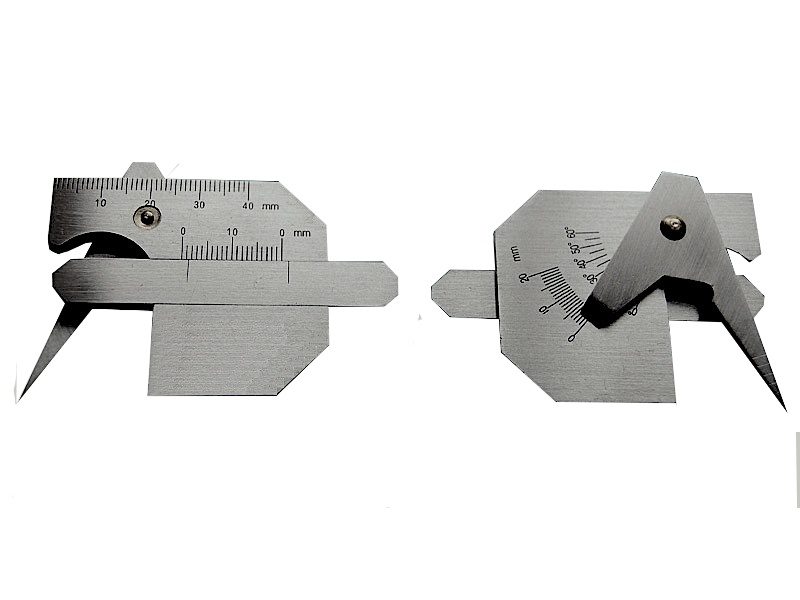
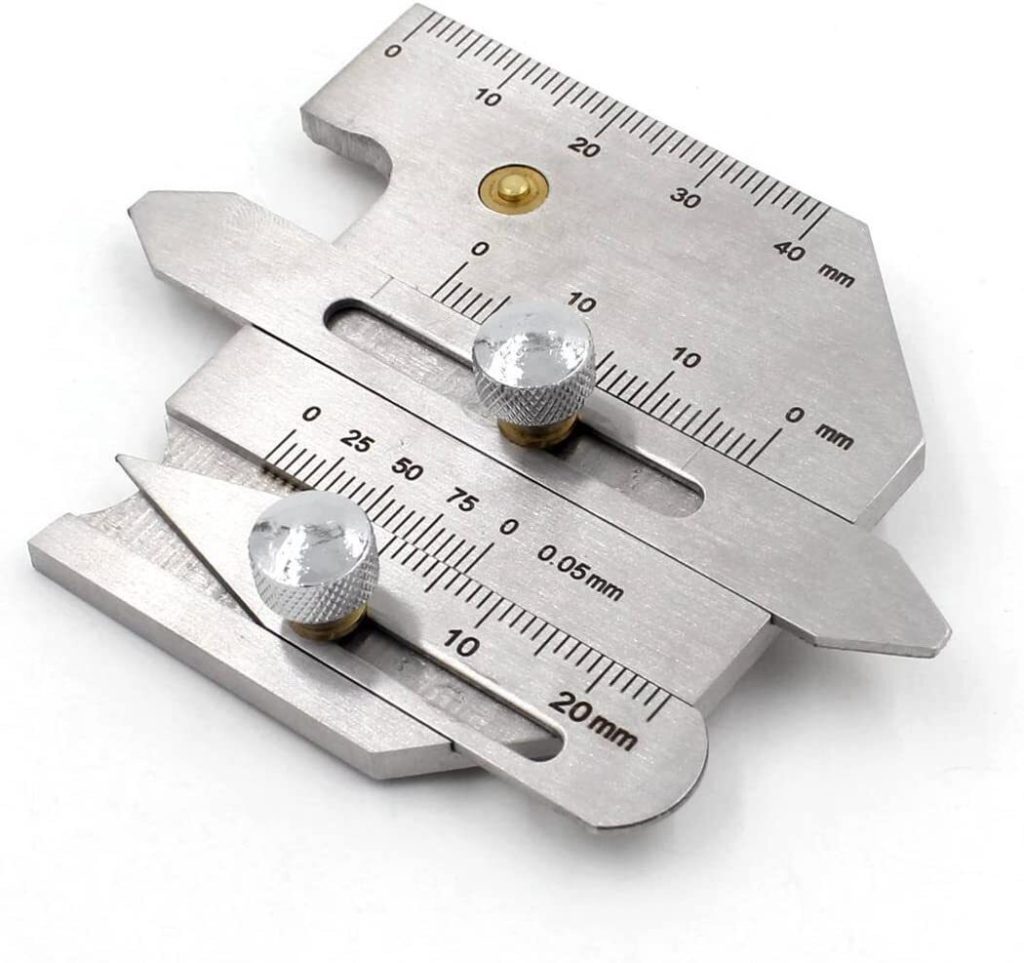
Welding gauges are tools used in the welding industry to measure, inspect, and evaluate various aspects of a weld. These gauges are designed to ensure that welds meet the required standards and specifications, resulting in a strong and durable joint. They are typically made of metal or plastic and come in various shapes and sizes, depending on their specific purpose.
Importance of Welding Gauges
Welding gauges play a crucial role in maintaining the quality and integrity of welds. They help to ensure that the welding procedure is carried out correctly, and the resulting welds meet the necessary standards for strength and reliability. By measuring and inspecting weld profiles, joint fit-up, dimensions, and welding parameters, these gauges provide valuable feedback to welders and inspectors, allowing them to identify and correct any defects or discontinuities.
Types of Welding Gauges
There are several types of welding gauges available, each designed for a specific inspection or measurement purpose. Some common types include:
-
Fillet Weld Gauges: These gauges are used to measure the size of fillet welds, which are commonly used in lap joints, T-joints, and corner joints. They typically consist of a set of blades or notches of varying sizes that can be placed against the weld to determine its dimensions.
-
Butt Weld Gauges: Butt weld gauges, also known as groove weld gauges, are used to inspect the dimensions and profiles of butt welds, which are commonly used in pipe connections and plate-to-plate joints. These gauges typically have a series of grooves and notches that correspond to standard weld sizes and profiles.
-
Gap Gauges: Gap gauges are used to measure the root gap, which is the distance between the edges of the metal being welded. These gauges are particularly important in ensuring proper penetration and fusion of the weld.
-
Weld Reinforcement Gauges: These gauges are used to measure the amount of weld bead or reinforcement on the surface of the weld. They help to ensure that the weld meets the required reinforcement specifications without excessive buildup.
-
Undercut Gauges: Undercut gauges are used to detect and measure undercutting, which is a type of weld defect characterized by a groove or depression along the base metal adjacent to the weld. These gauges have notches that can be placed against the weld to determine the depth and extent of undercutting.
Measurement and Inspection
Measuring Weld Profiles
One of the primary roles of welding gauges is to measure the profiles of welds. This involves checking the size, shape, and dimensions of the weld to ensure that it meets the specified requirements. Weld profiles are critical for the strength and integrity of the joint, as improper sizing or shape can lead to weak spots or failure under stress. By using fillet weld gauges, butt weld gauges, and other profile measurement tools, welders can accurately assess the dimensions of the weld and make any necessary adjustments to achieve the desired profile.
Inspecting Joint Fit-Up
Welding gauges are also essential for inspecting the fit-up of joints before welding. Fit-up refers to the alignment and proximity of the materials being joined and plays a crucial role in determining the quality of the weld. Proper fit-up ensures that the weld will have sufficient strength and prevent defects such as gaps or excessive weld size. Welding gauges, including gap gauges, allow welders to check the root gap and ensure that it falls within the specified tolerance limits. This inspection process helps to guarantee proper penetration and fusion during welding.
Evaluating Weld Dimensions
Accurate measurement of weld dimensions is essential to ensure that the weld meets the specified requirements. Welding gauges, such as fillet weld gauges and butt weld gauges, allow welders to measure the dimensions of the weld, including throat thickness, leg length, and penetration depth. By comparing the measured dimensions with the specified values, welders can assess whether the weld is within acceptable tolerances and make any necessary adjustments to achieve the desired dimensions.
Verifying Welding Parameters
Welding gauges also play a crucial role in verifying welding parameters such as welding angle, welding position, and travel speed. These parameters significantly affect the quality and properties of the weld. Welding angle and position gauges allow welders to ensure that the weld is made at the correct angle and position, avoiding potential defects such as lack of penetration or excessive reinforcement. By using travel speed gauges, welders can monitor the speed at which they move the welding torch or electrode, ensuring consistent weld quality throughout the process.
Ensuring Weld Quality
Welding gauges are vital in ensuring the overall quality of the weld. By providing accurate measurements and inspections, these gauges help to identify any defects or discontinuities that could compromise the strength or integrity of the joint. With the information gathered from the gauges, welders can take appropriate corrective actions to rectify any issues and ensure that the weld meets the required quality standards. This, in turn, helps to prevent costly rework, repairs, or even complete failure of the welded structure.
Identifying Defects and Discontinuities
Welding gauges are excellent tools for identifying and locating common weld defects and discontinuities. These defects can include porosity, gas inclusions, cracking, undercutting, incomplete fusion, overlap, burn-through, and discoloration. By using the appropriate gauges, welders can detect the presence and severity of these defects, enabling them to take appropriate remedial actions. Early detection of defects is critical for maintaining the quality and integrity of the weld, as it allows for timely repairs or rework to ensure that the final product meets the necessary standards.
This image is property of productinfoimg.luna.se.
Ensuring Correct Welding Procedure
Monitoring Welding Angle and Position
Proper welding angle and position are crucial for achieving optimal weld quality. Welding gauges designed for angle and position measurement provide an effective way to monitor and maintain the correct parameters throughout the welding process. By ensuring that the welding angle and position gauges align with the specifications, welders can avoid potential issues such as lack of penetration or excessive reinforcement. This monitoring process helps to ensure that the weld is made in the most efficient and effective manner, resulting in a high-quality joint.
Verifying Weld Reinforcement
Weld reinforcement refers to the amount of weld bead or reinforcement present on the surface of the weld. Proper reinforcement is vital for achieving the desired strength and durability of the joint. Weld reinforcement gauges are used to measure the height and width of the reinforcement, ensuring that it falls within the specified limits. By verifying the weld reinforcement, welders can make any necessary adjustments to ensure that it meets the required standards, avoiding issues such as weak spots or excessive buildup.
Checking Weld Penetration
Weld penetration is a critical parameter that determines the strength and integrity of the weld. Insufficient penetration can lead to weak joints, while excessive penetration can cause issues such as burn-through or distortion. Welding gauges, particularly those designed for measuring throat thickness and penetration depth, allow welders to check the level of penetration and ensure that it falls within the specified limits. This verification process helps to ensure that the weld has the required depth of fusion and adequate penetration into the base metal.
Assessing Welder Technique
Welder technique plays a significant role in the quality of the weld. Welding gauges can be used to assess various aspects of the welder’s technique, including consistency, travel speed, and the distance between the welding torch or electrode and the workpiece. By monitoring these parameters using appropriate gauges, welders can identify any issues or inconsistencies in their technique and make any necessary adjustments to achieve a consistent and high-quality weld. This assessment process ensures that the welder is following proper procedures and producing welds that meet the required standards.
Maintaining Welding Standards
Welding gauges are indispensable tools for maintaining welding standards and ensuring consistency across different welding operations. By using these gauges to verify the various parameters and dimensions of the weld, welders can ensure that they are adhering to the required standards and specifications. This helps to establish a consistent and uniform quality across different welds and avoids potential issues such as variations in appearance, strength, or fit-up. By maintaining welding standards, welders can ensure that each weld meets the necessary requirements for safety, reliability, and performance.
Measuring Welding Material Thickness
Determining Base Metal Thickness
Before commencing the welding process, it is essential to determine the thickness of the base metal. Welding gauges designed for measuring base metal thickness provide an accurate and efficient way to determine this critical parameter. These gauges typically consist of stepped notches or jaws that can be placed against the base metal to measure its thickness. By knowing the base metal thickness, welders can select the appropriate welding parameters and ensure that the weld will have adequate penetration and fusion.
Checking Weld Thickness
In addition to measuring the base metal thickness, it is equally important to check the thickness of the weld itself. Welding gauges designed for measuring weld thickness enable welders to determine this crucial parameter accurately. These gauges often consist of blades of varying sizes that can be placed against the weld to measure its thickness. By comparing the measured thickness with the specified requirements, welders can confirm that the weld has been deposited to the required thickness. This checking process helps to ensure that the weld will have sufficient strength and meet the specified standards.
Monitoring Root Gap
The root gap is the distance between the edges of the metal being welded, particularly in butt joints. Monitoring the root gap is essential to ensure proper penetration and fusion during welding. Gap gauges designed for measuring root gap provide an effective way to monitor and maintain this critical parameter. These gauges often consist of stepped notches or jaws that can be placed against the root gap to measure its width. By monitoring the root gap, welders can ensure that it falls within the specified tolerance limits, avoiding issues such as lack of fusion or excessive reinforcement.
Measuring Fillet Weld Size
Fillet welds are commonly used in various joint configurations, and accurately measuring the size of these welds is important for ensuring their strength and integrity. Fillet weld gauges provide an efficient way to measure the size of fillet welds. These gauges often consist of blades or notches of varying sizes that can be placed against the weld to measure its dimensions. By measuring the fillet weld size, welders can confirm that it meets the specified requirements, avoiding potential issues such as inadequate strength or excessive size.
This image is property of rktmaya.com.
Checking for Alignment and Tolerance
Inspecting Alignment of Welded Components
Proper alignment of welded components is critical for achieving a strong and reliable joint. Welding gauges designed for inspecting alignment provide an effective way to ensure that the components are correctly positioned before welding. These gauges often consist of straight edges, rulers, or templates that can be placed against the components to check their alignment. By inspecting the alignment, welders can identify any deviations from the specified positions and make the necessary adjustments to achieve proper fit-up. This inspection process helps to ensure that the weld joint will have the required strength and integrity.
Checking Welded Component Position
In addition to inspecting the overall alignment of welded components, checking the individual positions of the components is also important for achieving a quality weld. Welding gauges designed for component position checking provide a precise and efficient way to ensure that the components are correctly positioned relative to each other. These gauges often consist of notches, grooves, or pins that can be inserted into pre-drilled holes or reference points on the components. By checking the component positions, welders can verify that they meet the specified requirements, avoiding issues such as misalignment or gaps.
Verifying Tolerance Levels
Tolerance levels are specified to ensure that the weld and the welded components meet the required standards for fit and function. Welding gauges designed for verifying tolerance levels provide an accurate and reliable way to ensure that the dimensions and positions of the weld and the welded components fall within the specified tolerances. By using these gauges to measure and inspect the dimensions, fit-up, and alignment, welders can confirm that they meet the specified requirements. This verification process helps to ensure that the weld will have the desired functionality and avoid potential issues such as interference or improper assembly.
Preventing Welding Distortion
Measuring Weld Shrinkage
Welding distortion, also known as shrinkage, is a common issue that occurs during the cooling and solidification of the weld. Welding gauges designed for measuring weld shrinkage provide a valuable tool for monitoring and assessing this distortion. These gauges often consist of reference points or lines that can be placed on the workpiece before welding. By comparing the position of these reference points or lines before and after welding, welders can determine the magnitude and direction of the shrinkage. This measurement helps to anticipate and account for the distortion, allowing for proper planning and corrective actions to minimize its effects.
Assessing Distortion of Welded Parts
In addition to measuring weld shrinkage, it is also important to assess the overall distortion of the welded parts. Welding gauges designed for assessing distortion provide an effective way to evaluate the changes in dimensions, angles, or positions caused by the welding process. These gauges often consist of rulers, straight edges, or templates that can be placed against the welded parts to check their distortion. By comparing the distorted dimensions or angles with the specified requirements, welders can identify any deviations and take the necessary corrective actions. This assessment process helps to ensure that the welded parts will have the desired functionality and fit.
Monitoring Heat-Affected Zone (HAZ)
The heat-affected zone, or HAZ, is the region of the base metal that undergoes significant thermal changes during welding. Monitoring the HAZ is important for ensuring that it does not exceed the specified limits, as excessive heat can lead to issues such as metallurgical changes, distortion, or reduced strength. Welding gauges designed for monitoring the HAZ provide an efficient way to assess the extent and severity of the heat-affected zone. These gauges often consist of visual indicators or temperature-sensitive materials that change color or show signs of heat exposure. By monitoring the HAZ, welders can ensure that it falls within the specified limits, avoiding potential issues related to excessive heat input.
Controlling Metal Expansion and Contraction
During the welding process, the base metal undergoes thermal expansion and contraction, which can cause significant stresses and distortions. Controlling these expansion and contraction effects is crucial for preventing issues such as cracking, buckling, or distortion. Welding gauges can help in this regard by providing guidance on proper preheating, interpass temperature control, and post-weld heat treatment. By following the recommended procedures and using the appropriate gauges to monitor the temperature and cooling rates, welders can effectively control the expansion and contraction effects, ensuring that the final product will have the desired dimensional stability and integrity.
This image is property of m.galgage.com.
Ensuring Safety Standards
Monitoring Welding Preheating
Preheating is a critical step in the welding process, especially for certain materials or joint configurations. Welding gauges designed for monitoring welding preheating provide an effective way to ensure that the required preheating temperature has been achieved and maintained throughout the welding process. These gauges often consist of temperature indicators or thermocouples that can be placed near the weld zone to monitor the temperature. By monitoring the preheating temperature, welders can ensure that it falls within the specified range, avoiding potential issues such as cold cracking or insufficient fusion.
Verifying Weld Clearance
Weld clearance refers to the minimum distance between the welding torch or electrode and any surrounding surfaces or materials. It is essential to maintain the proper weld clearance to prevent issues such as arc strikes, spatter, or damage to adjacent components. Welding gauges designed for verifying weld clearance provide an accurate and efficient way to ensure that the required distance is maintained throughout the welding process. These gauges often consist of notches, grooves, or strips of a specified thickness that can be placed around the weld zone to check the clearance. By verifying the weld clearance, welders can ensure that it meets the specified requirements, avoiding potential safety hazards or quality issues.
Checking Weld Surface Contamination
Surface contamination, such as oil, grease, dirt, or rust, can significantly affect the quality and integrity of the weld. Welding gauges designed for checking weld surface contamination provide a reliable way to assess the cleanliness of the surfaces before welding. These gauges often consist of visual indicators or chemical test papers that can be used to detect the presence of contaminants. By checking the weld surface for contamination, welders can ensure that it is clean and ready for welding, avoiding potential issues such as lack of fusion, porosity, or reduced strength.
Inspecting Welding Equipment Setup
Proper setup of welding equipment is crucial for ensuring the safety and quality of the weld. Welding gauges can be used to inspect the various components of the welding equipment, including gas regulators, hoses, welding torches, and electrodes. By using these gauges to verify the dimensions, fit, and alignment of the equipment, welders can ensure that it is in proper working condition and capable of delivering the required performance. This inspection process helps to prevent potential issues such as gas leaks, poor shielding gas flow, or improper electrode distance, ensuring a safe and efficient welding operation.
Quality Control and Documentation
Recording Weld Measurements
Accurate and consistent documentation of weld measurements is essential for quality control and traceability. Welding gauges provide an efficient way to record these measurements, ensuring that they are correctly documented and available for future reference. By using the appropriate gauges and measurement tools, welders can record dimensions, profiles, reinforcement, penetration, and other critical parameters of the weld. This documentation process helps to establish a comprehensive record of the weld characteristics and facilitates quality control inspections, audits, or troubleshooting activities.
Documenting Weld Inspection Results
In addition to recording weld measurements, documenting the results of weld inspection activities is crucial for ensuring quality control and traceability. Welding gauges provide an effective way to document these inspection results, ensuring that they are correctly recorded and readily available for review or analysis. By using the appropriate gauges and inspection tools, welders can document the inspection findings, including any defects, discontinuities, or deviations from the specified requirements. This documentation process helps to establish the quality history of the weld, allowing for proper evaluation, corrective actions, or future reference.
Maintaining Welding Records for Auditing
Maintaining comprehensive welding records is essential for auditing purposes and ensuring compliance with relevant standards, codes, or regulations. Welding gauges play a crucial role in supporting these record-keeping activities by providing accurate measurements, inspections, or assessments of the weld. By using these gauges to gather and document the necessary information, welders can create a reliable record of the welding process, including weld profiles, dimensions, fit-up, penetration, visual inspections, and any corrective actions taken. This record-keeping process helps to demonstrate compliance with the applicable requirements, facilitate auditing activities, and provide evidence of the weld’s quality and safety.
This image is property of www.hampdon.com.au.
Common Weld Defects
Porosity and Gas Inclusions
Porosity and gas inclusions are common weld defects that can compromise the strength and integrity of the weld. Porosity refers to small cavities or voids in the weld caused by the entrapment of gases such as hydrogen or nitrogen. Gas inclusions, on the other hand, are solid or semi-solid materials, such as slag or oxides, that are trapped within the weld. Welding gauges can help in identifying and assessing the severity of these defects by using visual indicators, ultrasonic testing, or radiographic inspection techniques. By detecting and quantifying porosity or gas inclusions, welders can take appropriate corrective actions, such as adjusting welding parameters, improving joint fit-up, or using proper shielding gas, to minimize or eliminate these defects.
Cracking
Cracking is a serious weld defect that can cause catastrophic failure of the joint. It can occur during or after welding and is typically characterized by linear discontinuities in the weld or base metal. Welding gauges can help in detecting and assessing the severity of cracking by using visual inspection, liquid penetrant testing, or magnetic particle inspection techniques. By identifying the type and extent of cracking, welders can determine the appropriate repair or rework procedures, such as applying preheat, controlling cooling rates, or using suitable filler materials, to prevent further propagation of the cracks and ensure the integrity of the weld.
Undercutting
Undercutting is a weld defect characterized by a groove or depression along the base metal adjacent to the weld. It is typically caused by excessive heat input or improper welding technique, leading to the removal of the base metal during the welding process. Welding gauges can help in identifying and measuring the depth and extent of undercutting by using notches or blades that can be placed against the weld. By detecting and quantifying undercutting, welders can evaluate the severity and take appropriate corrective actions, such as adjusting welding parameters, improving joint fit-up, or using proper welding techniques, to mitigate or eliminate this defect.
Incomplete Fusion
Incomplete fusion occurs when the weld metal fails to fuse with the base metal or previously deposited weld metal, resulting in a weak joint. This defect can lead to reduced strength, porosity, or lack of penetration. Welding gauges can help in identifying and assessing the severity of incomplete fusion by using visual indicators, radiographic inspection, or ultrasonic testing techniques. By detecting and quantifying incomplete fusion, welders can determine the appropriate corrective actions, such as adjusting welding parameters, improving joint fit-up, or using proper welding techniques, to ensure a complete and sound fusion between the weld and the base metal.
Overlap
Overlap is a weld defect characterized by the excessive overlapping of the weld bead or reinforcement on the surface of the weld. It is typically caused by improper welding technique, excessive weld size, or inadequate joint fit-up. This defect can lead to reduced strength, stress concentration, or potential weaknesses in the joint. Welding gauges can help in identifying and measuring the extent of overlap by using notches or blades that can be placed against the weld. By detecting and quantifying overlap, welders can evaluate the severity and take appropriate corrective actions, such as adjusting welding parameters, improving joint fit-up, or using proper welding techniques, to eliminate or minimize this defect.
Burn-Through
Burn-through is a weld defect characterized by the complete melting or burning away of the base metal or previously deposited weld metal. It is typically caused by excessive heat input, improper welding technique, or inadequate joint fit-up. This defect can compromise the strength, integrity, and dimensional stability of the joint. Welding gauges can help in identifying and assessing the severity of burn-through by using visual indicators or ultrasonic testing techniques. By detecting and quantifying burn-through, welders can evaluate the extent of the defect and take appropriate corrective actions, such as using proper welding techniques, adjusting welding parameters, or improving joint fit-up, to prevent further burn-through and ensure the quality of the weld.
Discoloration
Discoloration is a visual defect characterized by the change in color or appearance of the weld or base metal. It is typically caused by inadequate shielding gas coverage, improper cleaning or surface preparation, or excessive heat input. Discoloration can indicate issues such as oxidation, contamination, or inadequate fusion. Welding gauges can help in identifying and assessing the severity of discoloration by using visual inspection or color-discerning indicators. By detecting and quantifying discoloration, welders can evaluate the extent of the defect and take appropriate corrective actions, such as improving shielding gas flow, cleaning the surface, adjusting welding parameters, or using proper welding techniques, to prevent further discoloration and ensure the aesthetic and functional quality of the weld.
Conclusion
Welding gauges play a vital role in the welding industry by providing accurate measurements, inspections, and evaluations of welds. From measuring weld profiles to ensuring correct welding procedure and monitoring welding material thickness, these gauges help to maintain welding standards, prevent welding distortion, and ensure safety and quality. By identifying common weld defects and documenting weld measurements and inspection results, welding gauges contribute to quality control and compliance with standards. With their invaluable assistance in detecting and mitigating weld defects, welding gauges play a significant role in producing strong, reliable, and high-quality welds.
This image is property of www.gasweld.ie.


