Worried about your workpiece warping during welding? Look no further! We have all the tips and tricks you need to ensure that your precious workpiece stays flat and distortion-free. From proper preparation techniques to careful cooling methods, we’ve got you covered. Say goodbye to frustrating warping issues and hello to seamless welding projects. Let’s dive in and discover the secrets to maintaining a perfectly flat workpiece every time.
Choosing the Right Material
Understanding Material Properties
When it comes to preventing warping during welding, one of the most crucial factors to consider is the choice of material. Different materials have varying properties that can influence their susceptibility to distortion. Understanding these material properties is essential in selecting the right material for your welding project.
For instance, materials with low thermal conductivity, such as stainless steel or aluminum, are more prone to warping due to their inability to quickly dissipate heat. On the other hand, materials with higher thermal conductivity, like carbon steel, tend to have less distortion because they distribute heat more evenly. Additionally, factors such as the coefficient of thermal expansion and yield strength should also be taken into account when choosing the material.
Selecting Low Distortion Materials
Selecting low distortion materials is a smart strategy to minimize warping during welding. Low distortion materials are specifically engineered to resist deformation when exposed to high heat levels. These materials often have enhanced thermal conductivity and lower coefficients of thermal expansion, making them less susceptible to warping.
Some examples of low distortion materials include certain types of high-strength alloy steels, nickel-based alloys, and composite materials. Consulting with material experts or referring to specialized material databases can help you identify the most suitable low distortion materials for your welding project.
Preheating and/or Stress Relieving
Determining the Need for Preheating
Preheating is the process of raising the temperature of the workpiece before welding. This technique helps reduce the temperature differential between the welding heat and the surrounding material, thereby minimizing distortion. However, preheating is not always necessary and depends on factors such as material thickness, joint configuration, and welding process used.
Thicker materials generally require preheating to ensure uniform heat distribution and alleviate residual stresses. Similarly, joints with high restraint levels, such as T-joints or corners, may benefit from preheating to minimize distortion. However, for thinner materials and less restrictive joint designs, preheating may not be required.
Proper Preheating Techniques
When preheating is necessary, it is crucial to follow proper techniques to achieve effective heat distribution. Preheating should be done gradually and uniformly to avoid thermal shocks that can lead to distortion. Using heat blankets, ovens, or local heating methods are all viable options for preheating.
The preheating temperature should be determined based on the material’s properties and the joint design. It is recommended to refer to welding procedure specifications (WPS) or consult with welding experts to determine the appropriate preheating temperature and duration for your specific application.
Benefits of Stress Relieving
Stress relieving is a post-weld heat treatment process that helps to minimize distortion by relieving residual stresses accumulated during welding. This process involves heating the welded structure to a specific temperature below its critical range and then cooling it slowly. By doing so, internal stresses are reduced, resulting in a more stable and less distorted workpiece.
Stress relieving is particularly beneficial for welded structures that are highly restrained or subject to heavy loads during service. It helps to improve the integrity of the weldment and reduce the risk of cracking or warping. By incorporating stress relieving into your welding process, you can enhance the overall quality and dimensional stability of your workpiece.
Clamping and Fixturing
Importance of Stable Clamping
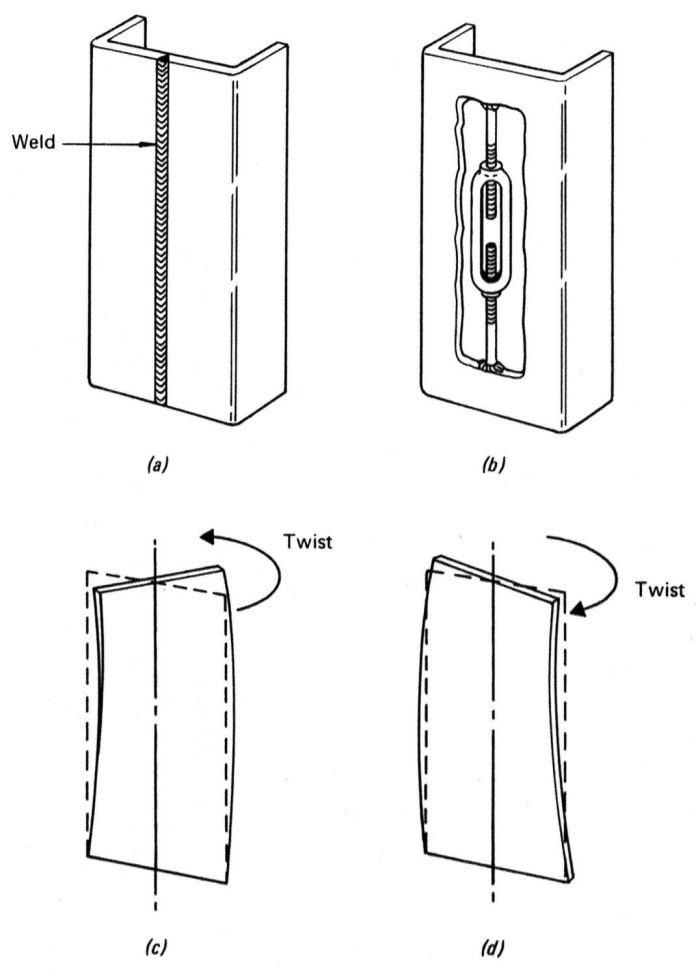
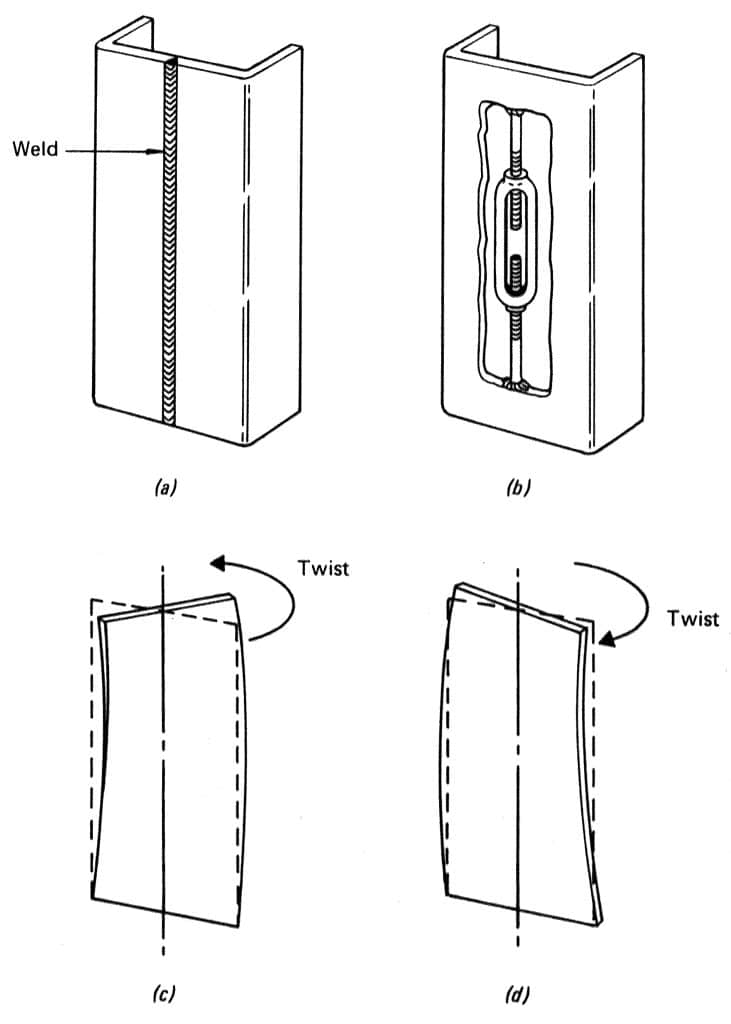
Proper clamping and fixturing play a vital role in preventing warping during welding. While welding, the heat generated causes the workpiece to expand and contract. Without adequate clamping or fixturing, this expansion and contraction can lead to unwanted distortion.
Stable clamping ensures that the workpiece remains securely in place during welding, minimizing the risk of movement or buckling. It helps to maintain the desired shape and alignment of the workpiece, reducing the chances of warping.
Using Jigs and Fixtures
Using jigs and fixtures can greatly enhance clamping stability and reduce distortion. Jigs and fixtures are custom-made devices that hold the workpiece in the desired position during welding. They provide additional support and control, limiting the movement of the workpiece. Jigs and fixtures also allow for consistent and repeatable welding setups, ensuring that each weld is performed under the same conditions.
By utilizing jigs and fixtures, you can improve the accuracy and precision of your welds while minimizing distortion. Ensure that the jigs and fixtures are designed to accommodate the specific joint configuration and welding technique used in your project.
Considerations for Magnetic Clamps
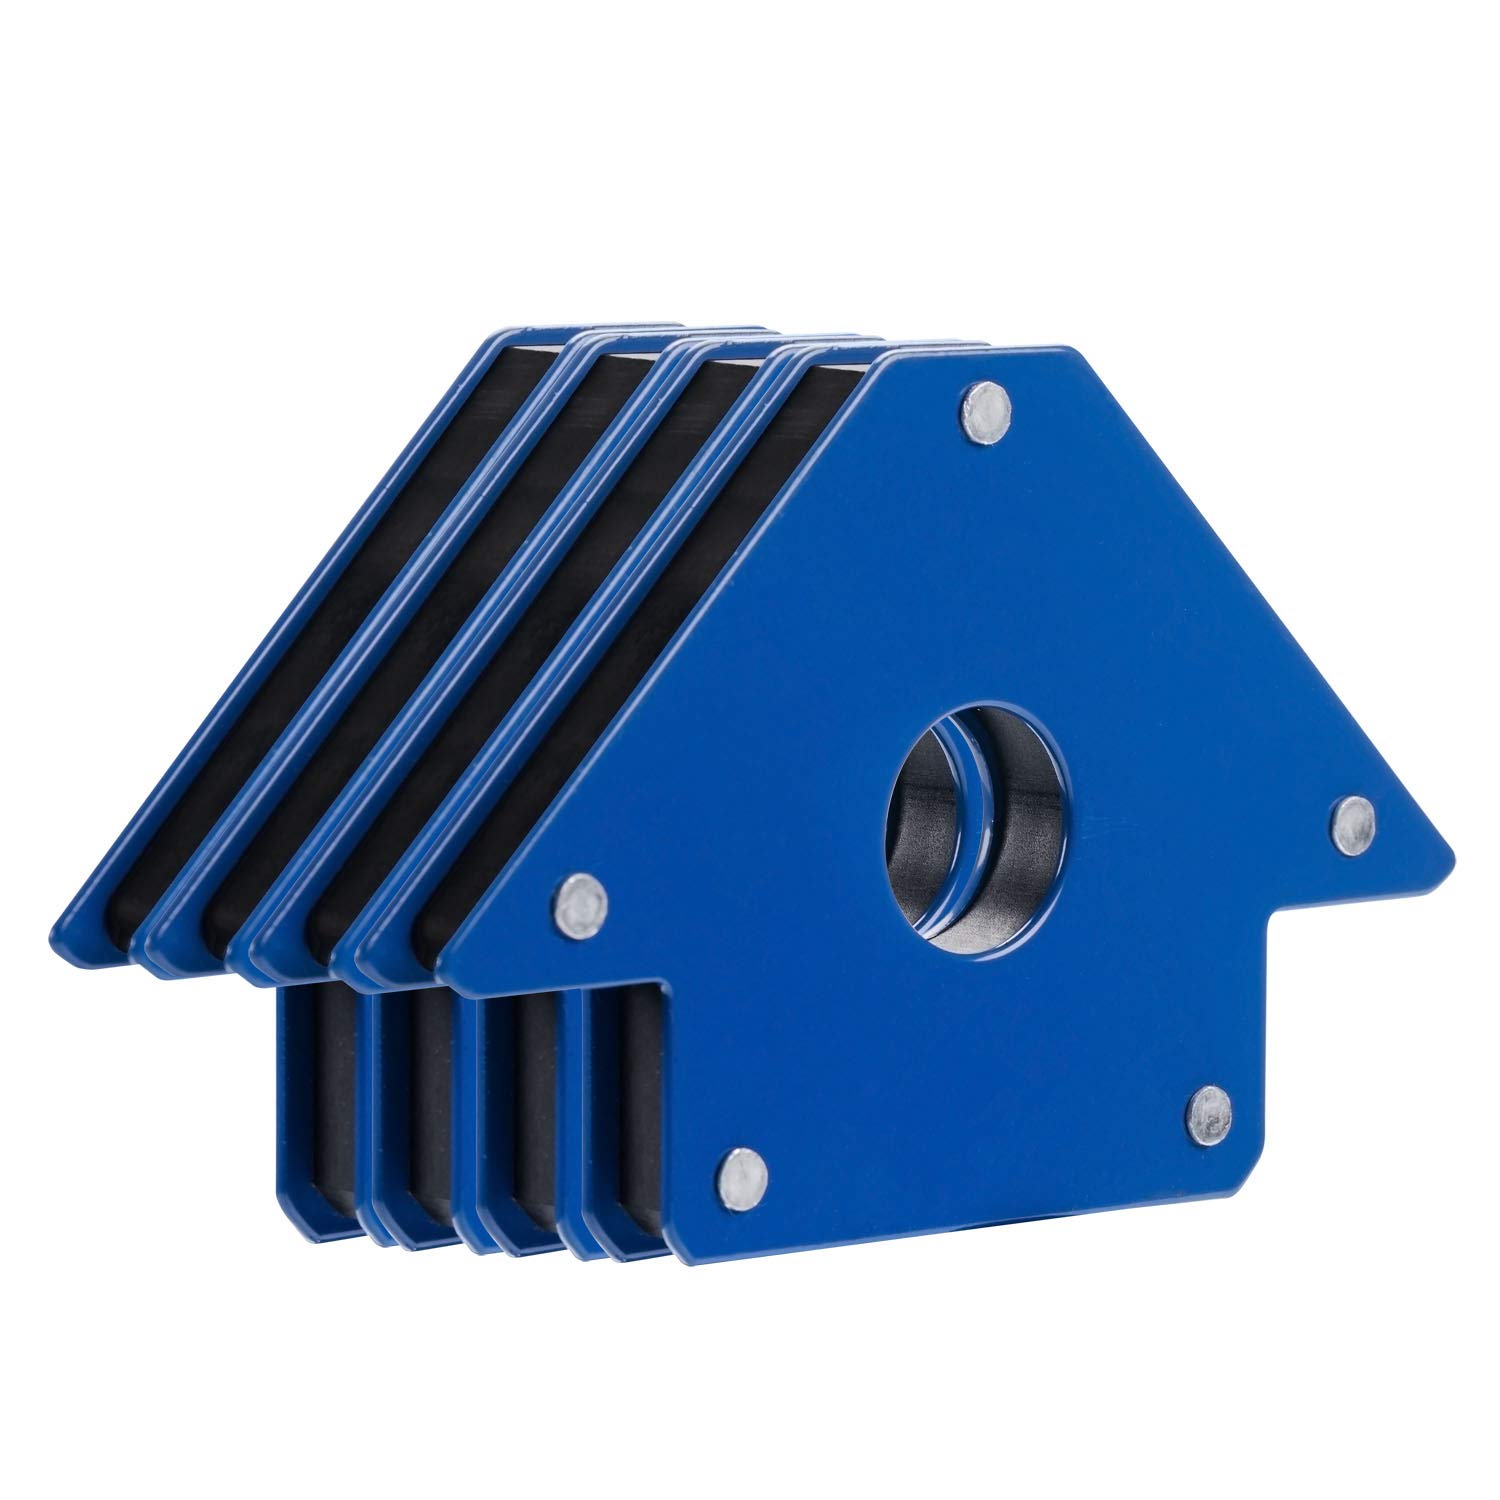
Magnetic clamps are a popular option for clamping ferromagnetic materials during welding. These clamps provide a convenient and secure method for holding workpieces in place. However, when using magnetic clamps, it is crucial to consider their potential impact on distortion.
Magnetism can affect the material’s heat distribution during welding, leading to uneven heating and an increased risk of warping. To mitigate this, it is recommended to use as few magnetic clamps as possible and position them strategically to minimize their interference with the welding process.
Controlling Welding Sequence
Understanding Sequence Effects
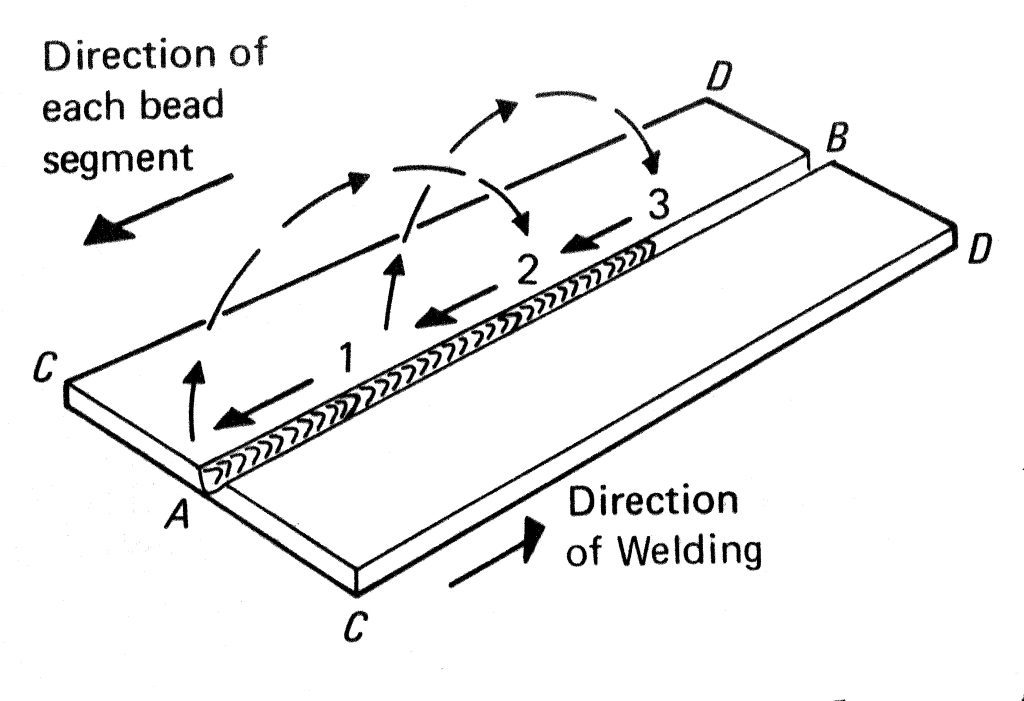
The order in which welds are performed can significantly influence the final distortion of a workpiece. This is due to the differential heating and cooling effects caused by the welding sequence. Understanding these sequence effects is essential for minimizing distortion.
Starting welding from the center and gradually moving outwards can help distribute heat more evenly, reducing the risk of localized distortion. Additionally, performing alternating welds on opposing sides of a joint can help balance the thermal effects and minimize deformation.
Minimizing Imbalance Effects
Imbalance effects occur when one side of a welded structure is subjected to more heat input than the other side. This imbalance can result in uneven expansion and contraction, leading to warping. To minimize imbalance effects, it is important to distribute the welding heat input as evenly as possible.
One effective technique is to use intermittent welding, incorporating short cooling breaks between welds. These breaks allow for heat dissipation and help prevent excessive localized heating. By carefully planning the welding sequence and alternating the welding direction, you can minimize imbalance effects and reduce distortion.
Tack Welding Techniques
Tack welding is a temporary welding method used to hold workpieces in position before making the final welds. When tack welding, it is essential to employ proper techniques to ensure minimal distortion.
Tack welds should be strategically placed to provide sufficient support and prevent movement of the workpiece during welding. Avoid excessive tack welds, as they can contribute to distortion. It is also vital to use low heat inputs during tack welding to minimize the risk of warping. Tack welds should be kept small and subsequently removed or incorporated into the final welds as necessary.
Reducing Welding Heat Input
Impact of Heat Input on Warping
The heat input during welding has a direct impact on the magnitude of distortion. Higher heat inputs result in greater expansion and contraction, increasing the potential for warping. Therefore, reducing welding heat input is crucial for minimizing distortion.
Controlling the welding parameters, such as current, voltage, and travel speed, allows for precise regulation of heat input. Lowering the welding current and voltage can help limit the heat generation, while reducing the travel speed ensures adequate heat dissipation. By optimizing these parameters, you can achieve a lower heat input, reducing the likelihood of warping.
Controlling Heat Output
In addition to managing the heat input, it is essential to control the heat output during welding. Heat output refers to the amount of heat generated by the welding process and transferred to the workpiece. By controlling heat output, you can limit the temperature rise in the surrounding material, thus minimizing distortion.
Using heat sinks or heat-absorbing materials in close proximity to the weld can help dissipate excess heat. These heat sinks act as a buffer and minimize the heat transfer to adjacent areas, reducing the chances of warping. Careful positioning and design of heat sinks can effectively control heat output and minimize distortion.
Pulsed Welding Methods
Pulsed welding methods are particularly effective in reducing overall heat input and minimizing distortion. Pulsed welding involves alternating high and low current levels during the welding process. By using shorter bursts of high current followed by longer periods of low current, heat input is reduced, resulting in less expansion and contraction.
Pulsed welding techniques are especially valuable for materials prone to distortion, such as aluminum or stainless steel. The controlled heat input provided by pulsed welding helps to maintain a stable temperature profile, limiting the potential for warping.
Proper Welding Techniques
Maintaining Low Welding Speeds
Welding speed plays a crucial role in minimizing distortion. Faster welding speeds can result in uneven heat distribution and inadequate heat dissipation, leading to warping. Therefore, maintaining low welding speeds is an effective approach in preventing distortion.
Lowering your welding speed allows for better control of the heat input and promotes proper heat distribution. It gives the material more time to dissipate heat evenly, reducing the risk of localized heating and subsequent warping. Be sure to adjust your welding speed accordingly based on the material properties and joint configuration.
Avoiding Excessive Heat Concentration
Excessive heat concentration in a specific area can cause localized distortion and lead to warping. It is important to avoid excessive heat concentration during welding by properly manipulating the welding torch or electrode.
Maintaining a consistent angle and distance between the welding torch or electrode and the workpiece helps to distribute the heat more evenly. Adequate manipulation techniques ensure that the heat is evenly spread over the weld joint, minimizing the risk of concentrated heating and subsequent distortion.
Balancing Weld Bead Size
Maintaining a balanced weld bead size is crucial for preventing distortion. Uneven bead sizes can result in uneven cooling rates and differential contraction, leading to warping. By achieving uniform bead sizes, you can ensure consistent heat distribution and minimize distortion.
Balancing weld bead size can be achieved through proper welding technique, including even deposition of filler material and consistent travel speed. It may require practice and skill to achieve consistent bead sizes, but the effort is worthwhile in preventing distortion and preserving the structural integrity of the workpiece.
Cooling Techniques
Using Slow Cooling Methods
The cooling rate after welding can significantly affect the distortion of the workpiece. Rapid cooling can cause uneven contraction, leading to warping. Utilizing slow cooling methods is an effective technique to minimize distortion.
One way to achieve slow cooling is by allowing the weld to naturally air cool. This method allows for gradual heat dissipation throughout the workpiece, reducing the risk of distortion. Alternatively, using blankets or insulation materials to cover the weld can slow down the cooling process, helping to control the temperature gradient and minimize distortion.
Post-Weld Heat Treatment
Post-weld heat treatment (PWHT) is a commonly used technique to relieve stresses and minimize distortion in welded structures. This process involves subjecting the weldment to controlled heating and cooling cycles after welding. PWHT helps to further alleviate residual stresses and enhance the dimensional stability of the workpiece.
The specific post-weld heat treatment process and parameters vary depending on factors such as material, joint configuration, and intended application. Consulting with welding professionals or referring to welding codes and standards can provide insights into the appropriate post-weld heat treatment for your specific welding project.
Water Quenching Considerations
Water quenching is the rapid cooling of the welded structure by immersing it in water. While water quenching can be effective in restraining distortion and reducing residual stresses, it should be used with caution.
Water quenching creates significant thermal gradients and differential contraction rates, which can result in distortion if not properly controlled. It is essential to carefully plan and execute the water quenching process to ensure uniform cooling and minimize the risk of warping. Gradual immersion or the use of quenching media with slower cooling rates can provide better control and help prevent distortion.
Monitoring and Controlling Distortion
Using Straightedges and Templates
Using straightedges and templates during and after welding is a practical way to monitor and control distortion. Straightedges and templates allow you to assess the flatness and alignment of the workpiece and make necessary adjustments to minimize distortion.
During welding, periodically check the straightness of the workpiece using a straightedge. If deviations are observed, corrective actions can be taken immediately to prevent further distortion. Similarly, templates can be used to verify the dimensions and angles of the workpiece, ensuring that it meets the desired specifications.
Utilizing Real-Time Monitoring Tools
In addition to manual inspection methods, utilizing real-time monitoring tools can provide valuable insights into distortion during welding. There are various monitoring techniques available, such as strain gauges, displacement sensors, and thermal imaging cameras.
These monitoring tools offer real-time feedback on the deformation and temperature profiles of the workpiece. By monitoring distortion during welding, you can make timely adjustments to the welding parameters or implement corrective actions to mitigate distortion. Real-time monitoring helps ensure the quality and dimensional stability of the final weldment.
Minimizing Joint Constraints
Modifying Joint Designs
Joint design plays a significant role in the distortion of a welded structure. By modifying the joint design, you can minimize constraints and reduce the risk of warping.
One approach is to use larger fillet welds instead of butt welds. Fillet welds provide more flexibility compared to butt welds, allowing for greater movement and accommodating the thermal stresses and strains generated during welding. Additionally, incorporating more gentle transitions in joint configurations and avoiding sharp corners can help reduce constraints and distortion.
Introducing Angular Joints
Introducing angular joints is another effective technique to minimize distortion. Angular joints allow for controlled movement and relieve the stresses caused by thermal expansion and contraction during welding.
By introducing angles to the joint configuration, the workpiece has more freedom to adjust and accommodate the thermal stresses. This reduces the chances of distortion and promotes a more stable and uniform weldment.
Using Fillet Welds
Fillet welds are frequently used to join two components at right angles. When properly utilized, fillet welds can help minimize distortion by distributing stresses more evenly.
By employing fillet welds, the welding heat input is spread across a larger surface area, reducing the concentration of thermal stresses. Properly sized fillet welds, designed in accordance with applicable welding codes and standards, can effectively mitigate distortion and maintain the dimensional stability of the weldment.
Considerations for Thick Workpieces
Splitting Welding into Multiple Passes
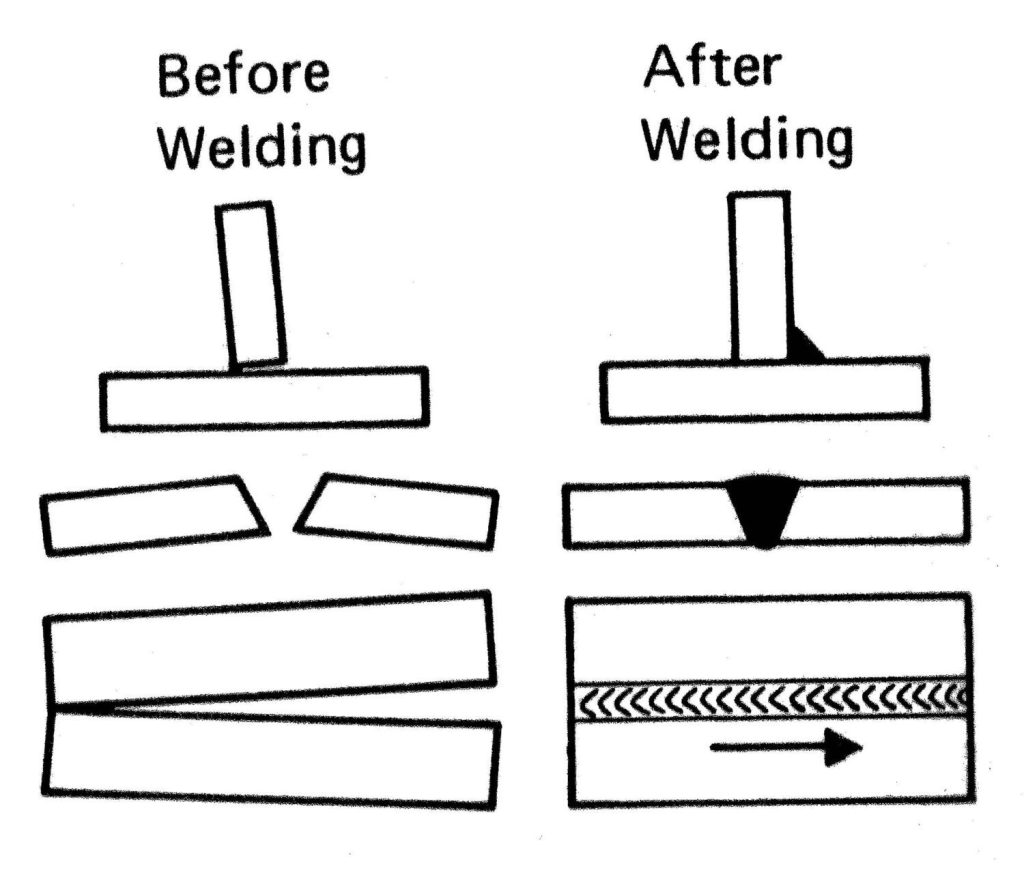
When working with thick workpieces, splitting the welding into multiple passes is a common practice to minimize distortion. This technique involves making several weld passes with smaller heat inputs rather than a single large pass.
By using multiple passes, each pass can cool sufficiently before the next one is performed, allowing for better control of the cooling rates and minimizing distortion. Additionally, the reduced heat input in each pass prevents excessive heating and reduces the overall risk of warping.
Proper Layer Cooling Techniques
Cooling between layers is crucial to prevent excessive temperature differentials and subsequent distortion in thick workpieces. Proper layer cooling techniques involve controlled cooling rates between each weld layer.
Allowing sufficient time for each layer to cool down before continuing with the next layer is essential to ensure uniform temperature distribution and minimize distortion. Slowing down the welding speed or using cooling methods like blankets or insulation materials can promote better layer cooling and reduce the risk of warping.
By implementing these techniques and carefully managing the welding process, you can significantly reduce the risk of distortion and preserve the dimensional stability of thick workpieces.
In conclusion, preventing warping during welding requires a comprehensive approach that encompasses the choice of materials, preheating techniques, proper clamping and fixturing, controlling welding sequence, minimizing heat input, employing suitable welding techniques, implementing effective cooling methods, monitoring distortion, minimizing joint constraints, and considering specific factors for thick workpieces.
By understanding the properties of the materials, selecting low distortion materials, and applying preheating and stress relieving techniques, you can optimize the weldment’s integrity. Proper clamping, the use of jigs and fixtures, and considerations for magnetic clamps ensure stable workpiece positioning. Controlling the welding sequence, minimizing heat input through pulsed welding or adjusting welding speeds, and maintaining proper welding techniques contribute to distortion reduction.
Using slow cooling methods, post-weld heat treatment, and careful water quenching considerations help manage the cooling rates and minimize distortion. Monitoring distortion in real-time using straightedges, templates, and specialized tools allows for immediate corrective actions. Minimizing joint constraints through modified joint designs, angular joints, and fillet welds reduces distortion. Lastly, when dealing with thick workpieces, splitting welding into multiple passes and implementing proper layer cooling techniques are crucial for dimensional stability.
By implementing these comprehensive strategies, you can achieve high-quality weldments with minimal distortion, ensuring the structural integrity and functionality of your workpiece.


